The first time I watched the Outdoor Boys bake fresh bread over a campfire, I couldn’t believe how simple the recipe looked. There were no fancy mixers, no complicated techniques, and no long list of ingredients—just a few pantry staples, a cast-iron pot, and glowing campfire coals.
Like many people, I assumed making bread outdoors would be difficult. But after trying it myself on a weekend camping trip, I realized that the secret isn’t special equipment—it’s patience, steady heat, and a reliable dough.
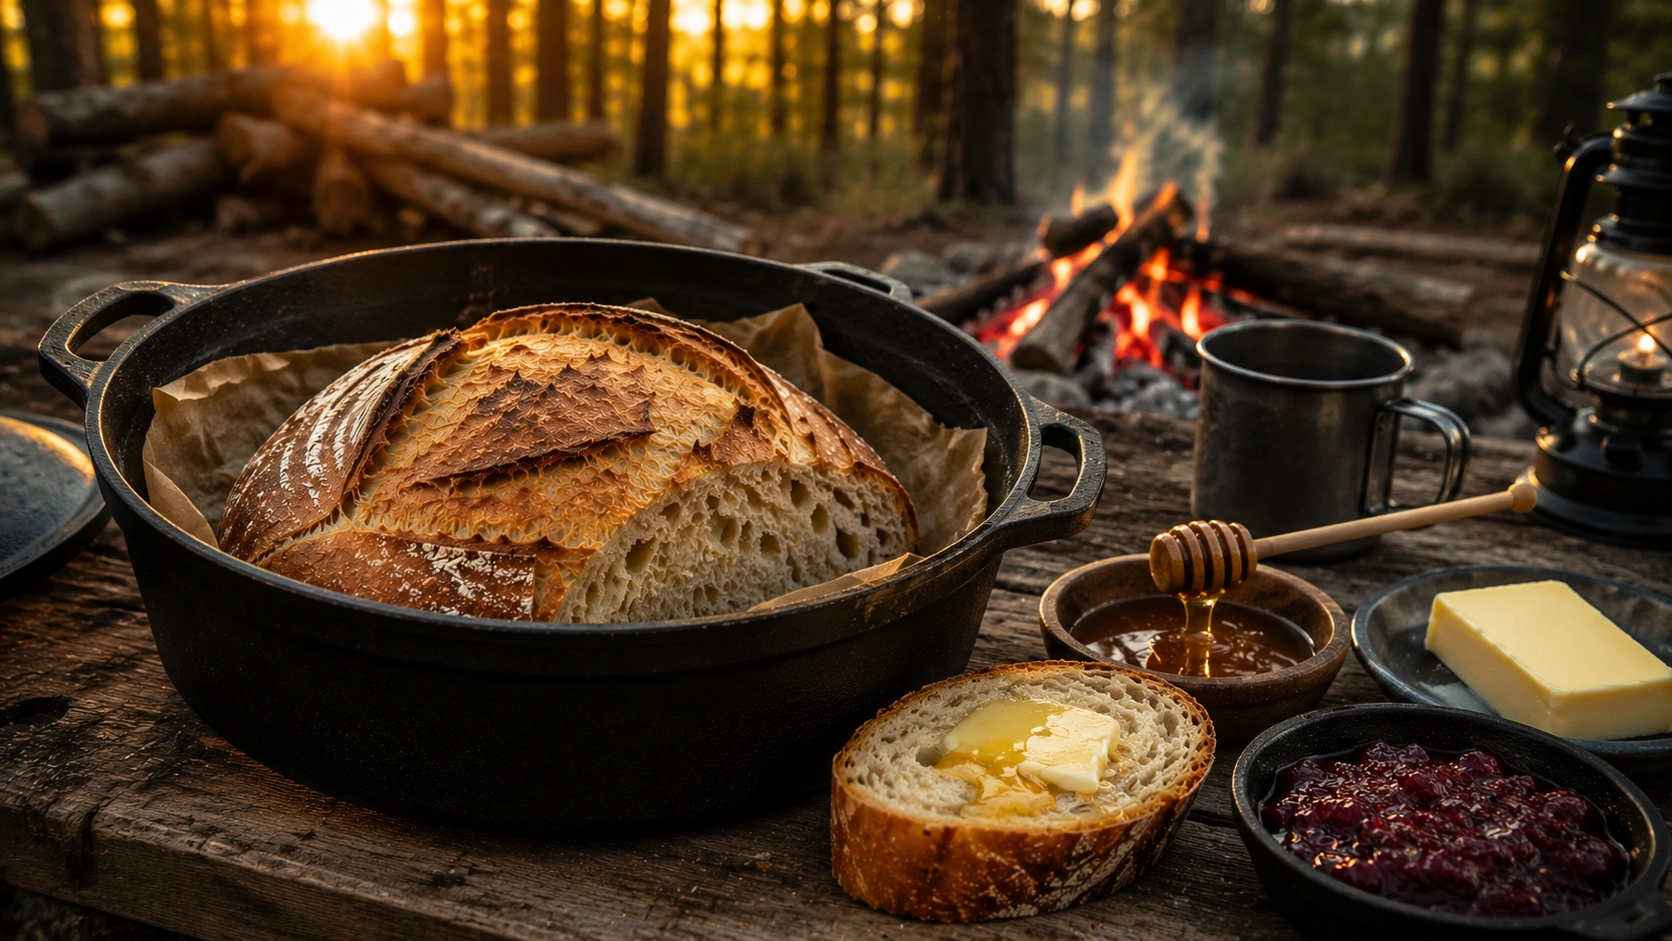
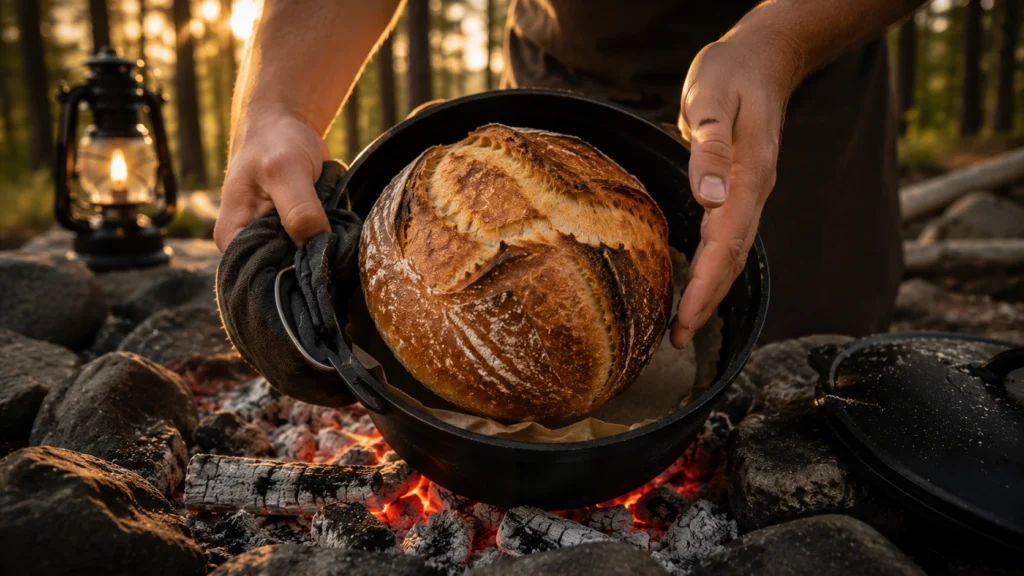
As the bread baked inside the Dutch oven, the smell of fresh bread mixed with the smoky aroma of the campfire. When I lifted the lid, the loaf had a beautifully golden crust with a soft, fluffy interior that was perfect with butter and honey.
Since then, this recipe has become one of my favorite outdoor meals because it’s simple, filling, and surprisingly forgiving. Whether you’re camping with your family, spending the weekend at a cabin, or simply baking in your backyard, this recipe delivers fresh homemade bread without needing a traditional oven.
This Outdoor Boys Bread Recipe recreates that rustic campfire experience using simple ingredients and beginner-friendly techniques. If you’ve always wanted to bake bread outdoors, this recipe is the perfect place to start.
What Is Outdoor Boys Bread?
Outdoor Boys Bread is a simple rustic loaf inspired by the campfire cooking style popularized by the Outdoor Boys camping adventures.
Instead of relying on specialized baking equipment, the bread is cooked inside a cast-iron Dutch oven or heavy cast-iron pot placed over hot coals. This method creates an environment similar to a traditional bread oven, allowing the loaf to develop a crispy crust while remaining soft and airy inside.
One reason this bread has become so popular is its simplicity. The dough uses common pantry ingredients, making it ideal for camping trips, hunting camps, fishing weekends, emergency cooking, or backyard fire pit gatherings.
Unlike sandwich bread, Outdoor Boys Bread has a rustic appearance with a chewy crumb and golden crust that tastes incredible served warm.
Why You’ll Love This Outdoor Boys Bread Recipe
One of the biggest reasons campers love this bread is that it requires very little equipment while producing bakery-quality results.
Even first-time bread makers can achieve excellent results by following a few simple techniques.
Before we begin, here’s why this recipe stands out.
| Feature | Benefit |
|---|---|
| Campfire Friendly | Perfect for outdoor cooking |
| Simple Pantry Ingredients | Easy to prepare anywhere |
| Crispy Golden Crust | Bakery-style texture |
| Soft Fluffy Interior | Great for sandwiches or butter |
| Family Friendly | Kids love fresh camp bread |
| Beginner Friendly | Easy enough for first-time bakers |
Few outdoor recipes provide as much satisfaction as pulling a fresh loaf of bread from a hot Dutch oven.
What Does Outdoor Boys Bread Taste Like?
Fresh campfire bread has a flavor that’s difficult to match with store-bought loaves.
The crust becomes slightly smoky and beautifully crisp while the inside remains soft, fluffy, and chewy.
Because the ingredient list is simple, every flavor comes through clearly. The butter adds richness, the yeast creates a light airy crumb, and the campfire gives the crust a subtle rustic character.
Served warm with butter, honey, or homemade jam, every slice tastes comforting and fresh.
That’s exactly why this Outdoor Boys Bread Recipe has become a favorite among campers and outdoor cooking enthusiasts.
Why Cast-Iron Cooking Makes Better Bread
A cast-iron Dutch oven acts like a miniature bread oven.
It traps heat evenly around the dough while holding moisture during the first stage of baking.
The comparison below shows why cast iron works so well.
| Cast Iron Dutch Oven | Regular Baking Pan |
|---|---|
| Even heat distribution | Uneven heating |
| Better crust | Softer crust |
| Holds moisture | Dries faster |
| Ideal for campfires | Best for indoor ovens |
Using cast iron helps produce the crispy crust that makes this bread so memorable.
Ingredients
One of the best things about this recipe is that every ingredient is easy to pack for a camping trip.
There are no specialty flours or complicated additions.
For the Bread Dough
| Ingredient | Amount |
|---|---|
| Bread Flour | 4 cups |
| Warm Water | 1½ cups |
| Active Dry Yeast | 2¼ teaspoons (1 packet) |
| Granulated Sugar | 1 tablespoon |
| Salt | 2 teaspoons |
| Olive Oil | 2 tablespoons |
These six ingredients create a dependable dough that’s soft, flavorful, and easy to work with.
Optional for Serving
Fresh bread is delicious on its own, but a few simple toppings make it even better.
| Ingredient | Amount |
|---|---|
| Butter | As desired |
| Honey | For drizzling |
| Homemade Jam | Optional |
Warm butter and honey remain the classic way to enjoy fresh camp bread.
How to Make Outdoor Boys Bread Recipe
Making homemade bread outdoors is easier than most people expect.
The key is allowing enough time for the dough to rise while maintaining steady cooking heat.
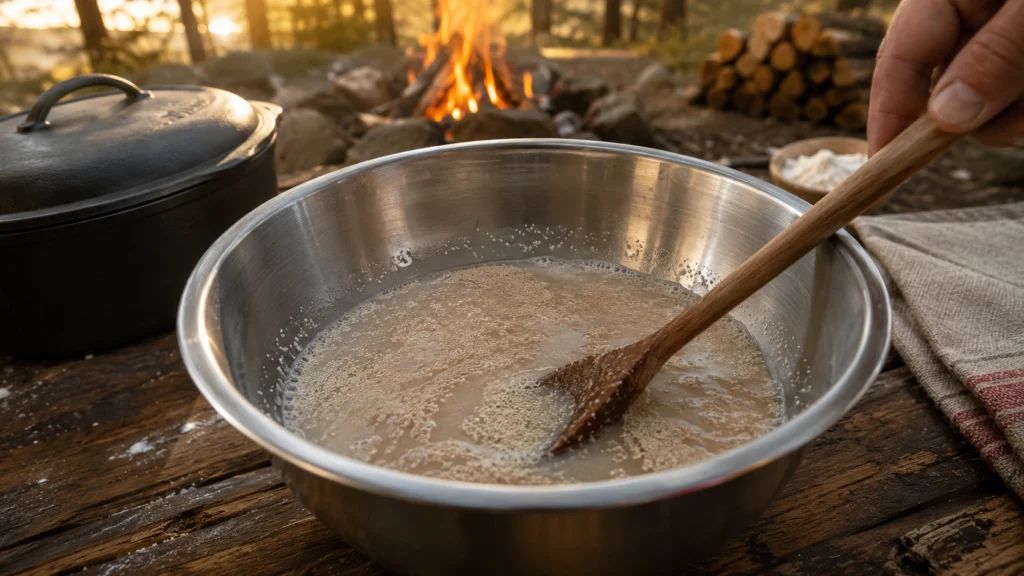
Step 1 – Activate the Yeast
Pour the warm water into a large mixing bowl and stir in the sugar. Sprinkle the active dry yeast over the surface and allow it to sit undisturbed for about 5 to 10 minutes.
During this time, the yeast should become foamy, which indicates that it is active and ready to use. If the mixture doesn’t foam, the yeast may be expired or the water may have been too hot or too cold.
Starting with properly activated yeast is one of the most important steps because it gives the bread the light texture everyone expects from homemade rustic loaves.
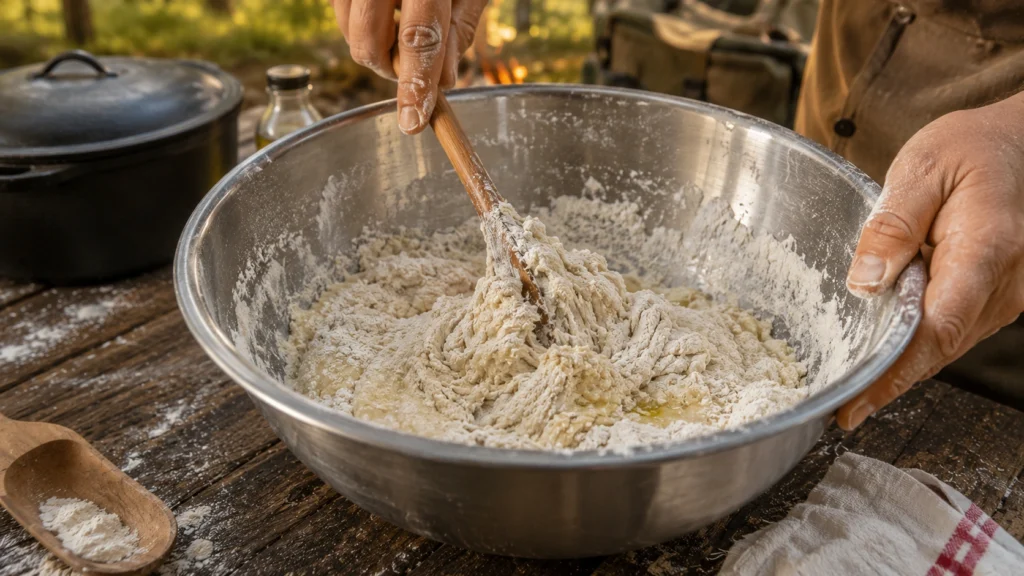
Step 2 – Mix the Dough
Once the yeast mixture becomes foamy, add the bread flour, salt, and olive oil. Stir everything together using a wooden spoon until a rough dough begins to form.
When the dough becomes too thick to stir, transfer it onto a lightly floured work surface. Don’t worry if it looks slightly shaggy at first because kneading will quickly bring it together into a smooth dough.
Using bread flour instead of all-purpose flour gives the finished loaf a slightly chewier texture and stronger structure, making it perfect for campfire baking.
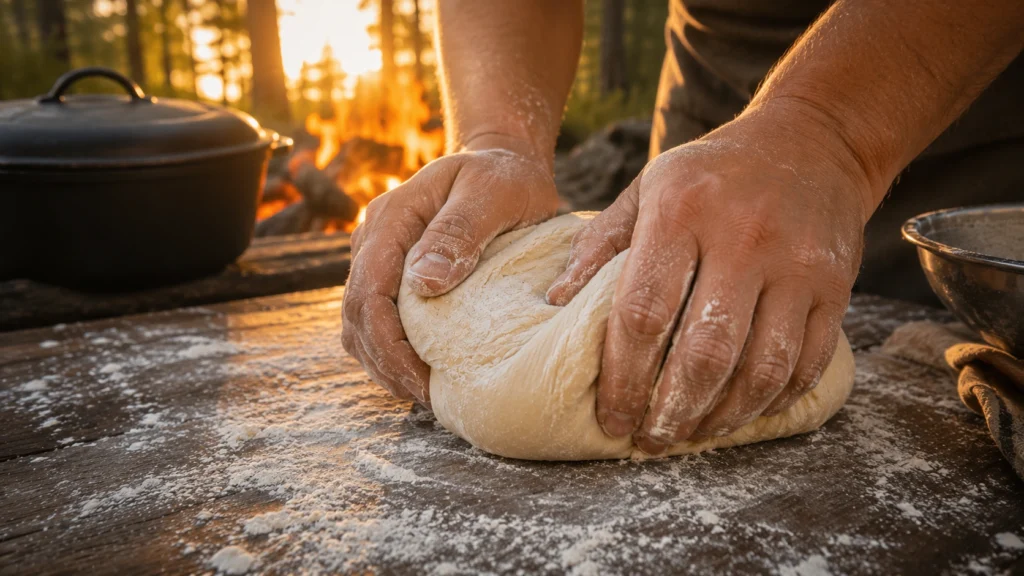
Step 3 – Knead the Dough
Knead the dough by hand for about 8 to 10 minutes until it becomes smooth, soft, and slightly elastic.
Use the heel of your hand to push the dough forward before folding it back over itself. Continue repeating this motion until the surface feels smooth and springs back when gently pressed.
Proper kneading develops gluten, which gives the bread its airy interior and helps it rise properly during baking. Rushing this step can result in a dense loaf.
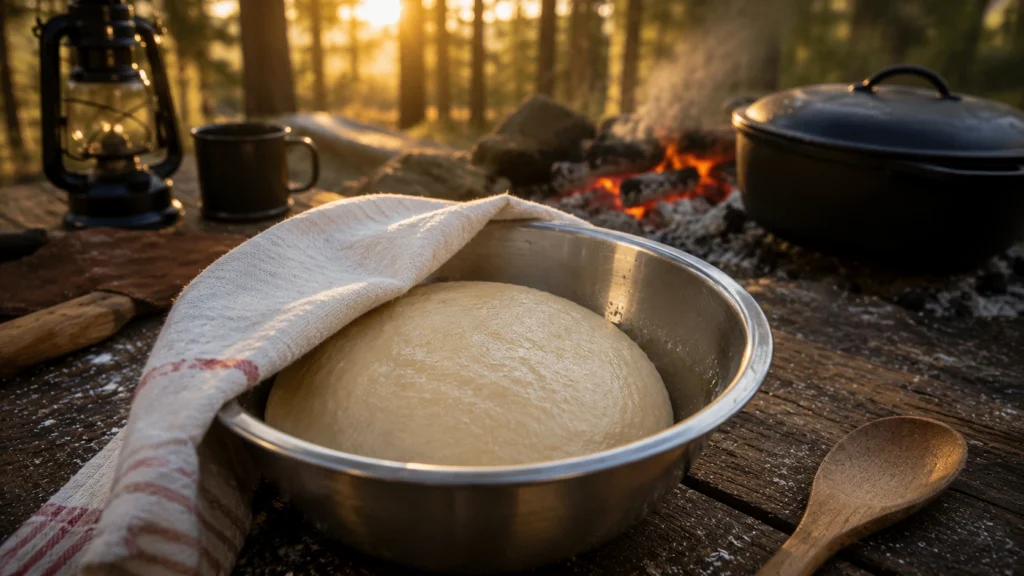
Step 4 – Let the Dough Rise
Lightly oil a large bowl and place the dough inside, turning it once so the surface is lightly coated.
Cover the bowl with a clean kitchen towel or plastic wrap and let it rise in a warm place for about 1 to 1½ hours, or until doubled in size.
Giving the dough enough time to rise creates a lighter crumb and improves both flavor and texture. Patience during this step makes a noticeable difference in the final loaf.
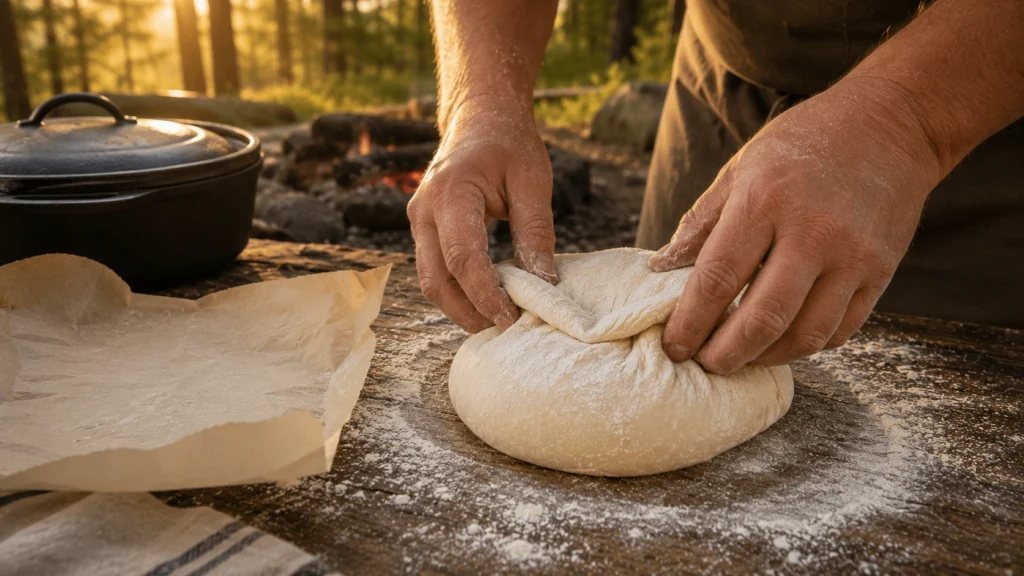
Step 5 – Shape the Dough
Once the dough has doubled in size, gently punch it down to release excess air.
Transfer it back to the work surface and shape it into a smooth round loaf by folding the edges underneath until the surface becomes tight.
Avoid overworking the dough during shaping because this can force out too much of the air created during fermentation. A gently shaped loaf bakes more evenly and develops a better rise.
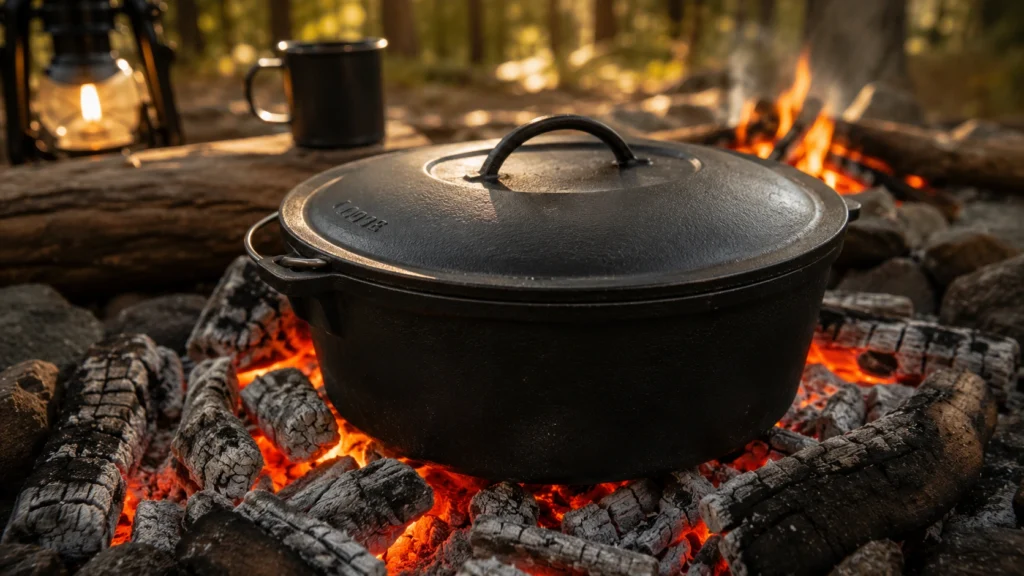
Step 6 – Prepare the Dutch Oven
About 30 minutes before baking, place your cast-iron Dutch oven (with the lid on) over hot campfire coals or inside a preheated 450°F oven if you’re baking indoors.
Preheating the Dutch oven is one of the biggest secrets to achieving a bakery-style crust. The hot cast iron creates an instant burst of heat when the dough is placed inside, helping it rise quickly and develop a crisp golden exterior.
If you’re cooking over a campfire, use a bed of glowing hardwood coals instead of large open flames. Consistent heat will bake the bread more evenly.
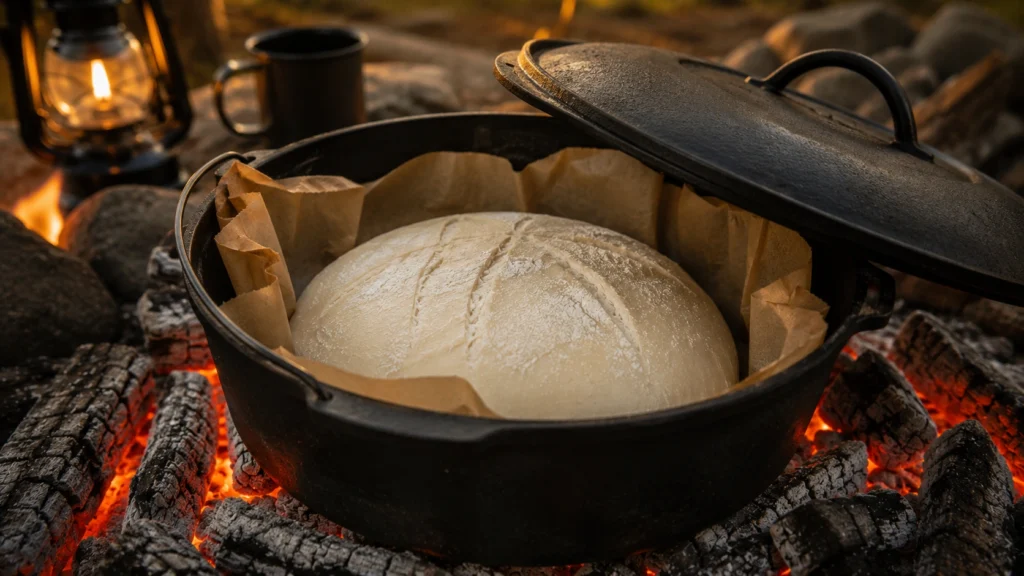
Step 7 – Bake the Bread
Carefully remove the hot Dutch oven using heat-resistant gloves and place the shaped dough inside on a sheet of parchment paper. Cover immediately with the lid.
Bake for 30 minutes with the lid on, then remove the lid and continue baking for another 15 to 20 minutes until the loaf becomes deep golden brown.
Removing the lid during the final stage allows excess moisture to escape, creating the crisp crust that makes homemade campfire bread so satisfying.
Step 8 – Check for Doneness
Carefully lift the bread from the Dutch oven and tap the bottom of the loaf.
If it sounds hollow, the bread is fully baked. You can also check the internal temperature with an instant-read thermometer. The center should read 200–205°F (93–96°C).
Properly baked bread will have a firm crust while remaining soft and fluffy inside. Taking a moment to check prevents underbaking.
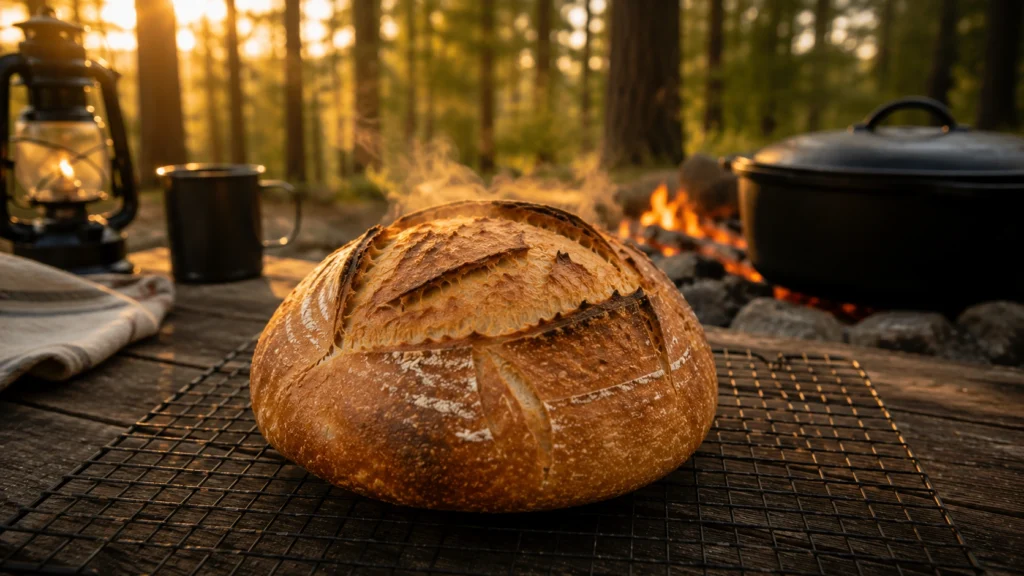
Step 9 – Cool Before Slicing
Place the finished loaf on a wire rack and allow it to cool for at least 20 to 30 minutes before slicing.
Although it’s tempting to cut into warm bread immediately, cooling allows the crumb to finish setting. Slicing too early releases steam and can make the inside gummy instead of light and airy.
This short resting period improves both the texture and the overall eating experience.
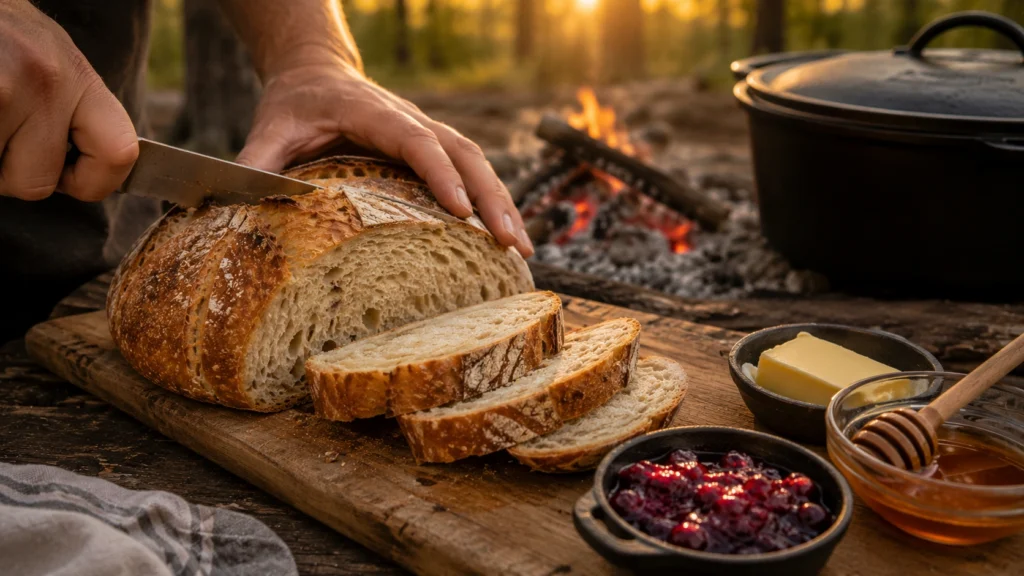
Step 10 – Slice and Serve
Using a serrated bread knife, slice the loaf into thick pieces and serve while still slightly warm.
Spread each slice with butter, drizzle with honey, or enjoy it alongside soups, chili, grilled meats, or campfire breakfasts.
Fresh homemade bread tastes best on the day it’s is baked, especially when shared around a campfire with family and friends.
What to Serve with Outdoor Boys Bread
Fresh camp bread pairs well with both sweet and savory meals.
Whether you’re camping or baking at home, these simple sides complete the meal.
| Side Dish | Why It Works |
|---|---|
| Butter & Honey | Classic campfire pairing |
| Homemade Jam | Sweet breakfast option |
| Beef Chili | Hearty comfort food |
| Vegetable Soup | Perfect for dipping |
| Campfire Stew | Rustic outdoor meal |
| Scrambled Eggs & Bacon | Great camping breakfast |
Simple accompaniments let the fresh bread remain the star of the meal.
Expert Tips for the Best Results
A few small details can dramatically improve the finished loaf.
Following these techniques consistently produces bakery-quality bread.
| Tip | Benefit |
|---|---|
| Preheat the Dutch Oven | Better oven spring |
| Use Bread Flour | Chewier texture |
| Don’t Rush the Rise | Better flavor |
| Bake with the Lid On First | Crisp crust |
| Let the Bread Cool | Cleaner slices |
Patience and steady heat are the biggest secrets to success.
Common Mistakes to Avoid
Bread is surprisingly forgiving, but these mistakes can affect the final loaf.
Avoiding them helps ensure consistent results.
| Mistake | Result |
|---|---|
| Water Too Hot | Kills the yeast |
| Skipping the First Rise | Dense bread |
| Not Preheating the Dutch Oven | Poor crust |
| Cutting Too Soon | Gummy interior |
| Uneven Campfire Heat | Uneven baking |
A little preparation goes a long way toward producing excellent bread.
Recipe Variations
One reason campers love this bread is how easy it is to customize.
Try one of these variations to create a different flavor.
| Variation | Change |
|---|---|
| Garlic Herb Bread | Add garlic powder and rosemary |
| Cheddar Bread | Mix shredded cheddar into the dough |
| Honey Oat Bread | Add rolled oats and honey |
| Whole Wheat Version | Replace half the flour with whole wheat flour |
| Dutch Oven Cinnamon Bread | Add cinnamon and brown sugar swirl |
Each variation keeps the rustic texture while adding its own unique flavor.
Storage and Reheating
Homemade bread stores well when kept properly.
For the freshest flavor, enjoy it within the first two days.
| Storage Method | Time |
|---|---|
| Room Temperature | 2 Days |
| Refrigerator | Up to 5 Days |
| Freezer | Up to 3 Months |
Wrap the loaf tightly in plastic wrap or foil before storing. Reheat slices in a toaster or warm oven to refresh the crust.
Nutrition Information
The values below are estimates and may vary depending on ingredients used.
| Nutrient | Amount |
|---|---|
| Calories | 210 |
| Protein | 6g |
| Carbohydrates | 38g |
| Fat | 4g |
| Saturated Fat | 0.5g |
| Fiber | 2g |
| Sugar | 2g |
| Sodium | 390mg |
Frequently Asked Questions
Yes. A cast-iron skillet with a heat-safe lid or a heavy oven-safe pot works well. However, a Dutch oven provides the most even heat and creates the crispiest crust.
Absolutely. Preheat your oven to 450°F and bake the bread in a preheated Dutch oven using the same timing. The results are very similar to the campfire version.
Inactive yeast, water that’s too hot, or not allowing enough rising time are the most common reasons. Always use fresh yeast and let the dough double in size before baking.
Fresh from the Dutch oven with butter and honey is the classic choice. It’s also excellent with soups, chili, stews, breakfast eggs, or sliced for sandwiches.
Yes. After the first rise, cover the dough and refrigerate it overnight. Let it sit at room temperature for about 30 minutes before shaping and baking the next day.
Why This Outdoor Boys Bread Recipe Is Worth Making
Some recipes are memorable because they’re complicated.
This one is memorable because it’s simple.
This Outdoor Boys Bread Recipe proves that a few basic pantry ingredients and a cast-iron Dutch oven are all you need to create fresh, homemade bread with a crisp crust and a soft, fluffy interior. Whether you’re baking beside a campfire, at a cabin, or in your own kitchen, the recipe delivers dependable results every time.
More than just a loaf of bread, it’s part of the outdoor experience. The smell of fresh bread baking over the fire, the first warm slice spread with butter and honey, and sharing it with family or friends are the moments that make camping unforgettable. Once you bake this loaf, it’s likely to become a tradition on every outdoor adventure.
Outdoor Boys Bread Recipe
Ingredients
Equipment
Method
- In a large mixing bowl, combine the warm water and sugar. Sprinkle the active dry yeast over the top and let it sit for 5 to 10 minutes until the mixture becomes foamy.
- Add the bread flour, kosher salt, and olive oil to the yeast mixture. Stir until a rough dough forms, then transfer it to a lightly floured surface.
- Knead the dough for 8 to 10 minutes until smooth, elastic, and slightly tacky. Place it in a lightly oiled bowl, cover, and let it rise for 1 to 1½ hours or until doubled in size.
- Punch down the risen dough and shape it into a smooth round loaf. Place it on parchment paper while the Dutch oven preheats.
- About 30 minutes before baking, preheat the cast-iron Dutch oven over a campfire with hot coals or inside a 450°F oven.
- Carefully place the dough into the hot Dutch oven using the parchment paper. Cover with the lid and bake for 30 minutes.
- Remove the lid and continue baking for 15 to 20 minutes, or until the loaf is deep golden brown and the internal temperature reaches 200–205°F.
- Transfer the bread to a wire rack and cool for 20 to 30 minutes before slicing. Serve warm with butter, honey, or your favorite toppings.
Notes
- Use bread flour for the best chewy texture and bakery-style crumb.
- Keep the water between 105°F and 110°F to activate the yeast properly.
- Preheating the Dutch oven is essential for creating a crispy crust.
- Use hardwood coals instead of direct flames when baking over a campfire.
- Allow the bread to cool before slicing so the crumb sets properly.
- Leftover bread is excellent for toast, grilled sandwiches, or French toast.
